How to Build a Reliable Payment and Subscription System

If you are building a full app, at some point you will want to add a payment system. Maybe you are launching a SaaS product, an AI tool, or a mobile app that has premium features. Whatever the reason, adding payments should not feel like a mystery. I am writing this in a simple way, explaining how I approach it and what I learned from doing it multiple times.
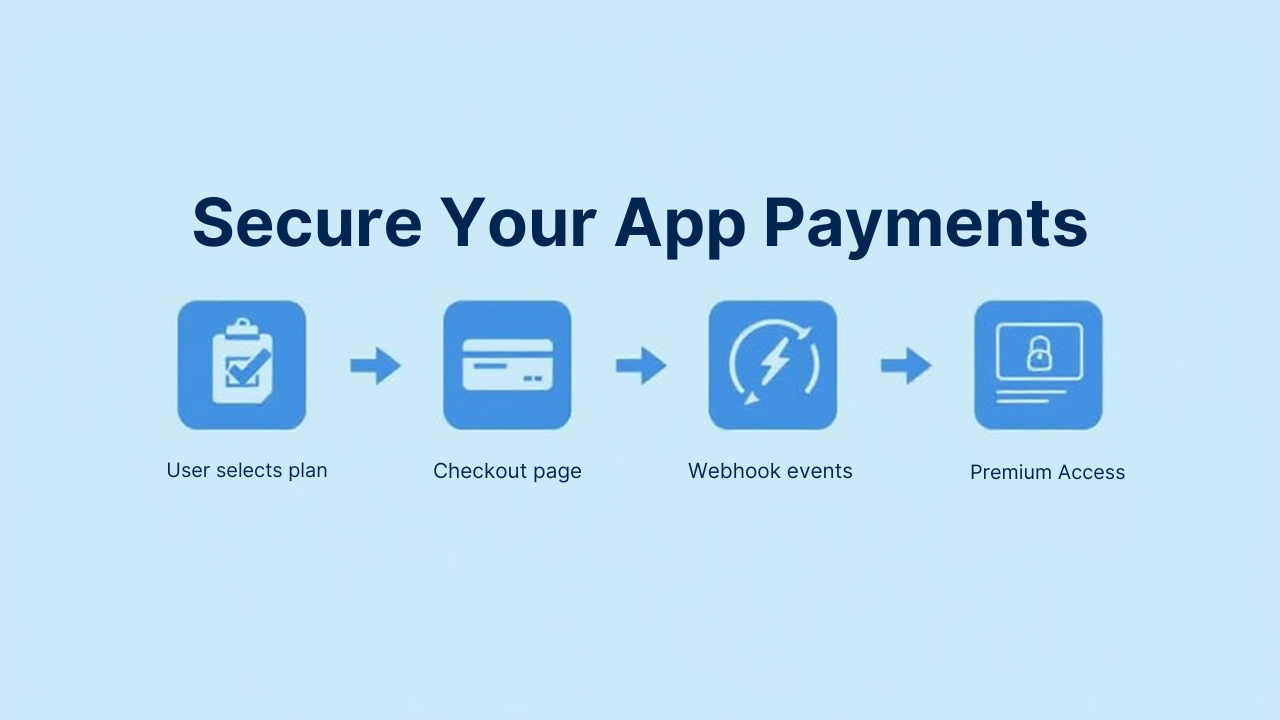
The idea is simple. Users pay. You give them access. When their subscription ends, you remove access. Stripe plus webhooks makes this process stable and automatic.
Let me break the entire process down from start to finish.
1. Start with the right payment provider
Before touching code, decide which payment provider fits your app.
Here is a simple way I think about it.
If your app serves people around the world, Stripe is usually the easiest. If your app is only for India, Razorpay can also work but Stripe is still better for subscriptions. PayPal is okay for one time payments but painful for full subscription management.
Think about these questions:
• Where are your users
• Do you need recurring billing
• Do you want proper API and webhooks
• How fast do you want payouts
• Do you want a system that grows with you
Once you answer these, you will usually end up choosing Stripe, especially for SaaS.
A simple real life example: If your app is used by people in the US, India and Europe, Stripe handles all currencies and renewals for you. You will not need to create custom logic for each country. That is why it becomes the default choice.
2. Set up your product and pricing
Inside Stripe, you create a Product and then one or more Prices under that product.
For example:
Product: Pro Plan
Prices:
• Monthly at 9 USD
• Yearly at 80 USD
Keep it simple. Many beginners create too many plans like Basic, Standard, Premium, Ultra, Lifetime, Team, Agency and so on. Then they lose track of which plan is active. Start with one or two plans only. You can expand later when real users start requesting features.
You also get separate test mode and live mode pricing. Make sure you copy the correct price IDs when going live. I made that mistake once and users were buying the test plan which paid me nothing. You want to avoid that.
3. Build the checkout flow
This is the moment your app starts talking to Stripe.
When a user clicks “Buy” or “Upgrade”, your frontend sends the selected price ID to your backend. Your backend then asks Stripe to create a checkout session. Stripe returns a session ID, and your frontend redirects the user to Stripe’s hosted checkout page.
You never touch card numbers. Stripe handles it.
A simple example of how the flow looks in real life:
- User visits your pricing page.
- They click “Upgrade to Pro Monthly”.
- Your frontend sends the monthly price ID to your backend.
- Backend creates a checkout session.
- Stripe gives you a session ID.
- Your frontend redirects user to Stripe’s secure checkout.
- User enters card and pays.
- Stripe redirects them back to your app.
This flow is safe, clean and reduces your work.
A tip. Always validate the price ID on the backend. Do not trust the frontend blindly. It prevents someone from sending a wrong price ID manually.
4. How subscriptions work behind the scenes
Many people think a subscription is just a tag that says “active” or “inactive”. It is more than that. When a user pays, Stripe creates:
• A Customer
• A Subscription
• An Invoice
• A Payment record
All these belong together.
You should store the Stripe Customer ID and Subscription ID in your database. This helps your app know which user is subscribed. Also remember that subscription renewals happen automatically every month or year. You do not manage this manually. Stripe does it for you.
But there is one important rule. Never rely only on your frontend success page. A user might close the tab before redirect. Their payment might require authentication. Their card might fail. This is why the next step is the most important part of this entire system.
5. Webhooks keep everything in sync
If you skip webhooks, your subscription system is broken even before launch. Webhooks are how Stripe tells your backend what happened.
Stripe can send events like:
• Payment succeeded
• Payment failed
• Subscription created
• Subscription renewed
• Subscription cancelled
• Card expired
Your app listens to these events at a webhook route like /api/webhook.
Inside this route, you update your database based on the event.
A simple example.
Imagine a user paid today. They get access. Next month Stripe tries to renew the payment but the card expires. Without webhooks, your system will still treat them as a paid user since you never updated their status. You will lose money and the system becomes unfair for real paying users.
With webhooks, Stripe sends “payment failed” at renewal. Your webhook updates your database and marks the user as past due. Then your app can either block premium features or give a short grace period.
Webhooks keep your system honest and automated.
6. Let users manage their subscription
Your users should be able to manage their subscription without emailing you.
They should be able to:
• Cancel their plan
• Switch between monthly and yearly
• Update their card
• View their invoices
You can do all this manually by creating your own UI and calling Stripe’s API. But for most apps, Stripe Billing Portal is easier. Stripe handles all the messy parts and you just drop a button that opens the portal.
This saves a lot of time and reduces support tickets.
7. Test all real scenarios
Testing is not only clicking “buy” once and calling it done. You have to test the real situations your users will face.
Test these:
• Successful payment
• Failed payment
• Renewal success
• Renewal failure
• User cancels subscription
• User upgrades mid month
• User downgrades
• Card expired
• User closes browser before redirect
Use Stripe’s test cards. They give cards that always fail, always succeed, require authentication, and so on. This helps you see how your webhook reacts and whether your database updates correctly in each case.
If you do not test this well, you will discover problems only when real customers hit issues. Fixing billing problems later is painful.
8. Final work before going live
Once everything is working in test mode, do these before launch:
• Replace test keys with live keys
• Replace test price IDs with live price IDs
• Add live webhook endpoint in Stripe
• Test one real payment yourself
• Make sure prices shown in UI are correct
• Check refund policy and cancellation policy
• Check your database sets correct user access
Also monitor the first few payments after launch. If anything looks off, you want to catch it early.
Final thoughts
Adding payment and subscription to your app is not as complicated as it first looks. Stripe handles the heavy parts for you. Your job is just to keep the system clean.
The real flow is simple.
User clicks Buy.
Stripe collects payment.
Stripe sends events to your webhook.
Your app updates user access based on those events.
If you keep your code small and your logic clean, your billing system will stay stable even when your user base grows.
Recent Insights
Thoughts efficiently shared on web development and tech.


